KF94 Mask Machine Installation Issues and Solutions
•
| KF94 Mask Machine Installation and Adjustment | ||||||
| No. | Topic | Customer | Picture | Joycreat reply | Picture | Remarks |
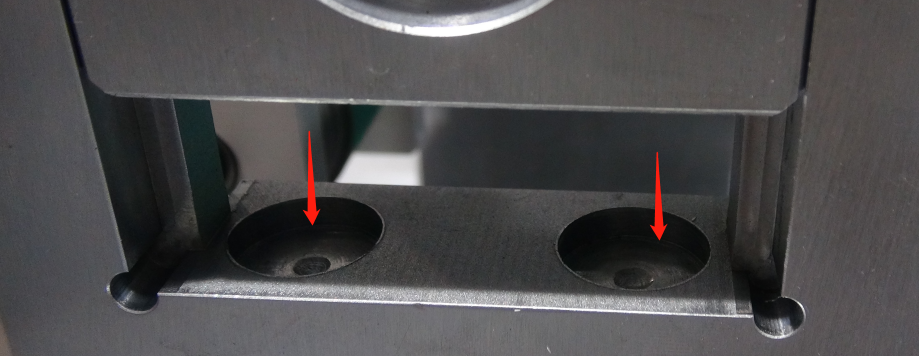
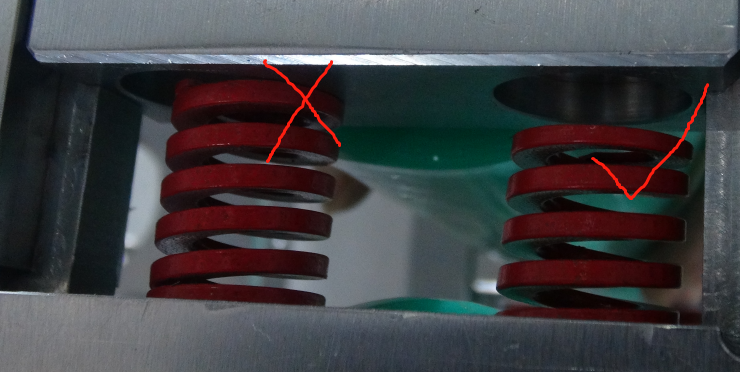
| 1 | Spring | Short spring lead to handle issue |  |
1) we have the same long spring; 2) whether it is too short, it depends on the hole on the block; 3)the spring should be in the upper hole and the lower hole of the block(see picture showed on the right) |
 |
|
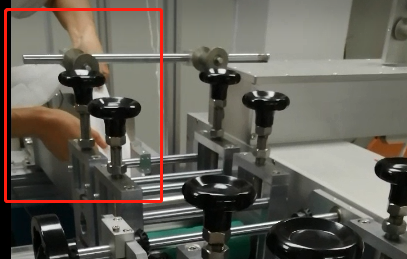
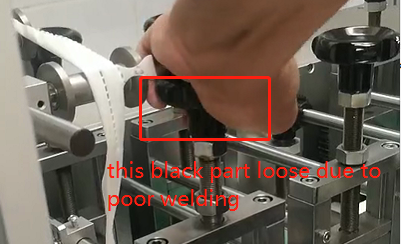
| 2 | Handle | Handle too hard to adjust; always need to use the tools |
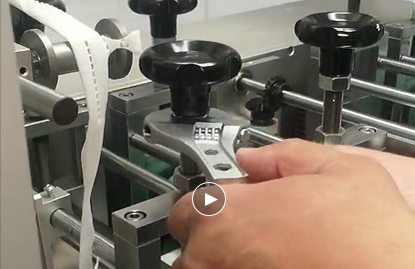 |
1) our 2nd cutting roller's handle also needs to use the tool, because the roller should be tight to cut the cloth. 2) Some machines' hardwares are not so perfect to match to each other, but it doesn't affect the use of the machine, as long as it can be adjusted. It is a bit more trouble to adjust. 3)we saw the black cap loose in your video, maybe the welding here is poor |
 |
|
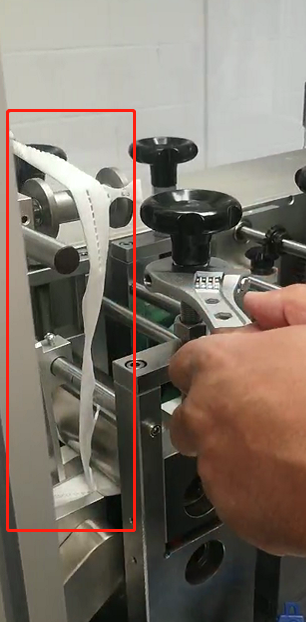
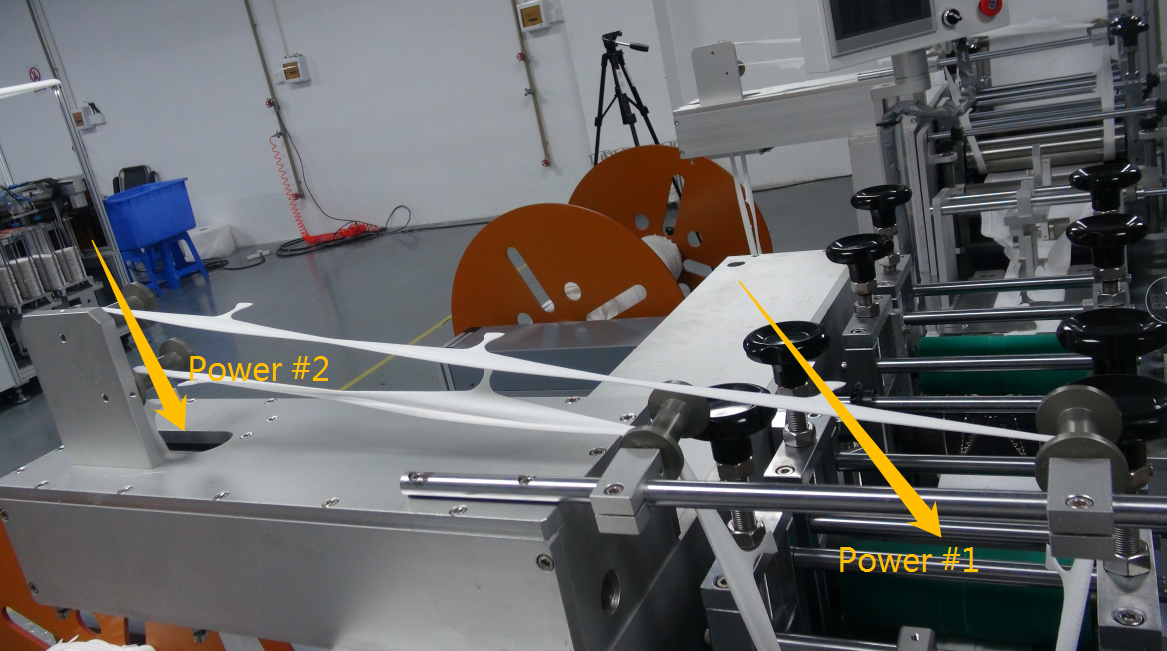
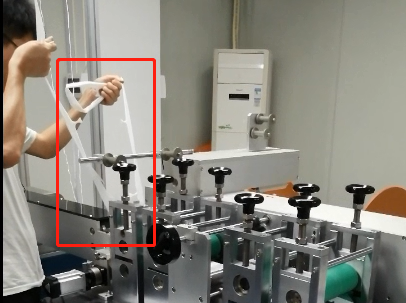
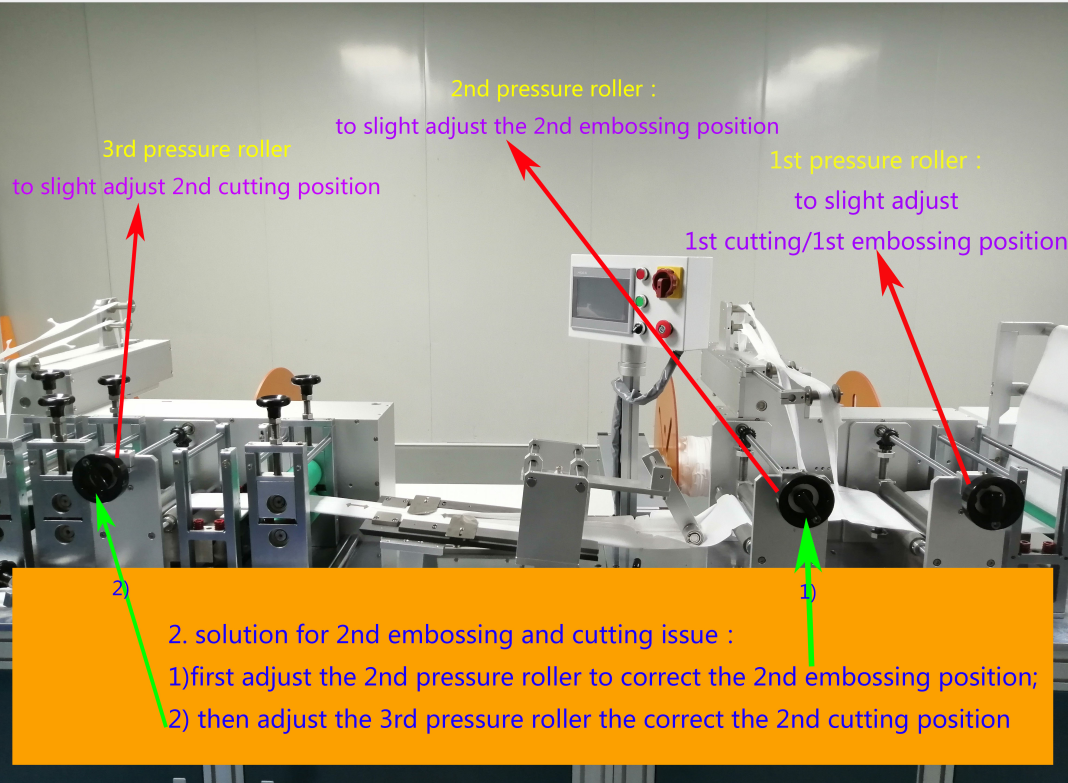
| 3 | Cloth | Cloth not flat after the second embossing and leads to embossing and cutting faults |
|
1) First let's make it clear: there are 2 major tension forces to drive the cloth run flat. (marked yellow ) 2)if the cloth became loose after 2nd embossing, we should check and adjust the Power#1 green roller 3) in your video, we saw it's very loose at the 2nd cutting place, which will lead to cutting faults. Solution: drag the cloth flat manually until the waste wrapped tightly into the winding roller. make sure the cloth runs flat, and then minor adjustment on the embossing and cutting |
|
|
| FYI. minor adjustment of the 2nd embossing and cutting |
 |
|||||
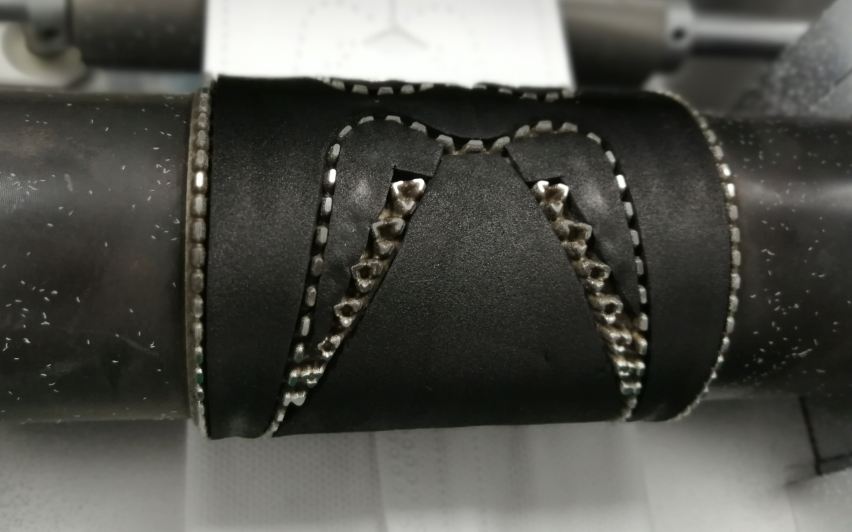
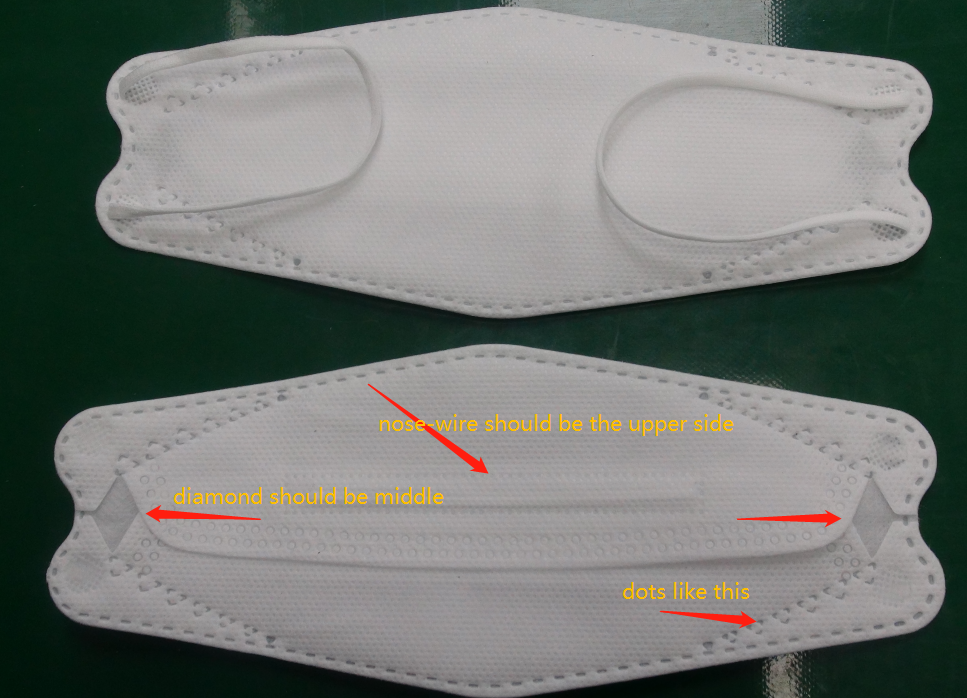
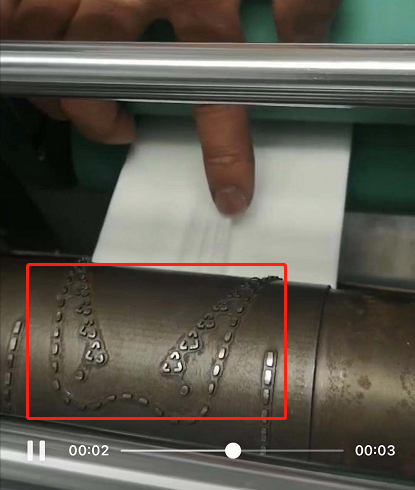
| 4 | Embossing | Embossing dot is too big |
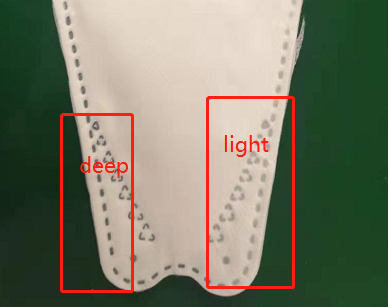 |
1) we found the embossing is deep on the left side, light on the right side. it means the embossing roller is not balance,should adjust the 2 handles' pressure to make it balance; 2)maybe due to the thick cloth, have to check the embossing tooth; |
||
 |
1)the embossing tooth(dot) looks too short, and it doesn't work well in the middle. 2)change the middle side HOT AIR COTTON to MELT BLOWN NONWOVEN , it means to use 2 layers melt blown nonwoven . To check whether it's ultrasonic problem or embossing dots problem. If embossing is good after changing to thinner cloth, it means the ultrasonic works well, but embossing dots(tooth) not. |
 |
|
|||
 |
||||||
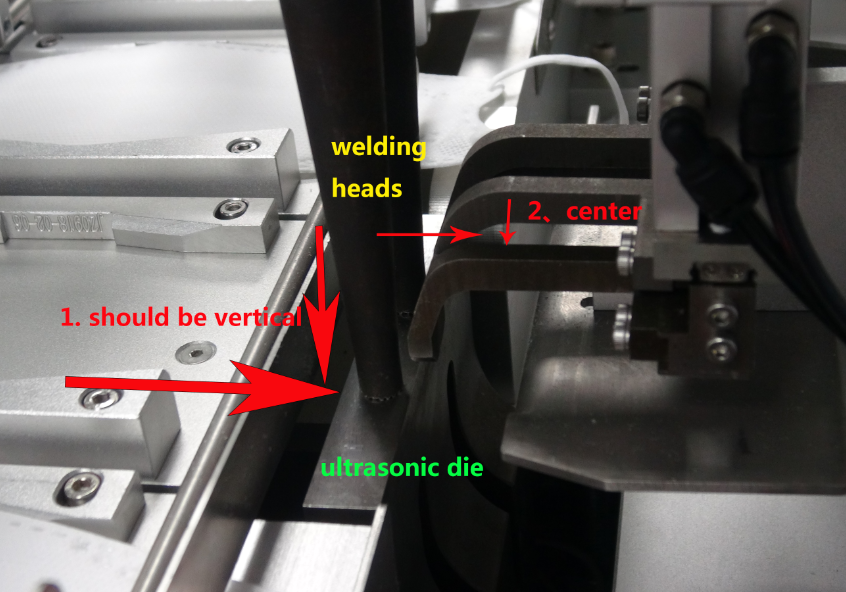
| 5 | Earloop welding faults | earloop welding is missing and messy | 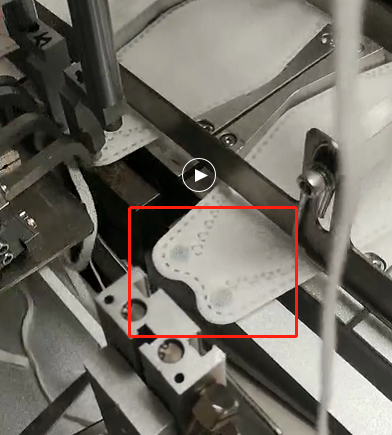 |
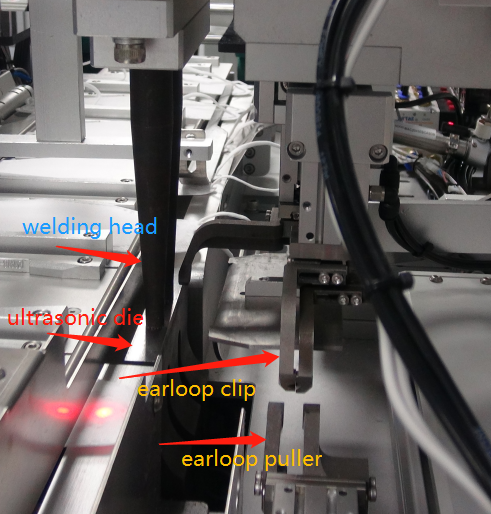
1. Hardware adjustment: 1)the weldinghead should be vertical ro the mask and ultrasonic die. and there should be some space between the welding head and ultrasonic system, at least for an A4 paper. 2)the clip which carries the ready earloop to mask . The welding head should vertically align to the middle of the space of this clip. there should be enough space when this clip turn back to mask , it should not contact or hit on the ultrasonic die. |
 |
|
 |
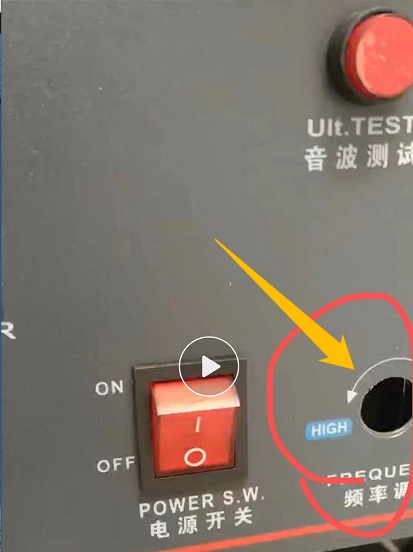
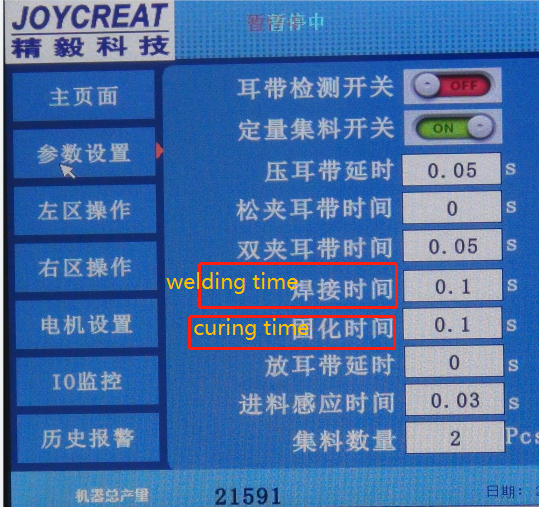
Solutions: 1) Adjust the screws and make them at the proper position. 2)Adjust the ultrasonic Frequency to get the proper proper pressure; 3)shorter welding time. It seems your welding time is a little long. 4) you might check the pin(thread) of welding head bottom. maybe it's deep and carry the mask up after welding. |
 |
 |
|||
| FYI. Key working parts as marked. 1) welding head 2)ultrasonic die 3) earloop puller 4)earloop clip make them in the correct position and work well together Attached are the settings for your information |
 |
|||||